The 7 Best Cake Decorating Tools for Beginners

During my baking journey, I have accumulated several cake decorating tools. Some have been more useful than others have.

cake decorating tools

 To help amateur bakers that may also be interested in decorating their cakes, I have made this list. Here are 7 cake decorating tools for beginners.

The items on this list are for basic cake decorating. If you wish to go into more advanced decorating, you will need tools that are more specialized.


1. A turntable

If you will be decorating cakes and working with buttercream, this will make your life easier. A wooden lazy Susan will serve the same purpose. A fancy turntable or lazy Susan will also double as a cake plate or stand.

 A great quality turntable will last years and will hold heavier multiple tier cakes. Purchase an affordable turntable first. An expensive turntable is an investment for the professional cake decorator.

2. A serrated knife

A serrated knife is indispensable for leveling cakes. Some brands just market these knives as bread knives. I recommend getting a long serrated knife.

Tip: it is easier to level a cold or frozen cake than it is to level a hot or warm cake.

3. Cake leveler

This is an amazing alternative if you are not good at leveling cakes with a knife. There are many helpful tutorials on how to properly level cakes on the internet. If you are still unable to level a cake with a serrated knife, a cake leveler will do the trick.

You need to buy a great quality leveler. Cheaply made levelers  bend while you are using them thus defeating the purpose.

4. An offset spatula

Offset spatulas come in many sizes. The size you have can affect its use. Smaller spatulas are great for filling layer cakes, smoothing and applying buttercream and frosting to desserts. These smaller spatulas are also amazing for creating patterns on buttercream-covered cakes.

Large cake spatulas (straight and offset) are good for applying and smoothening buttercream on cakes.

5. Piping Bag or Pastry bag

Regardless of what you call this item, it is an important cake decorating tool. These bags come in different materials and are either disposable or reusable. These bags are not only useful for piping buttercream but are also great for piping pastry and fillings. Piping borders would be a nightmare without this item.

6. Piping Tips

If you are a hobby baker, get a few piping tips or a set for your use. These are a great addition to any cake decorator’s kit. Classic tips such as the Wilton 1M, 2D, 124, 21 and 789 are popular among bakers. They are easy to master and use. Furthermore, they work for decorating cakes, cupcakes and piping pastries.

7. Icing Scraper (Straight and Serrated)

Icing scrapers are perfect for decorating buttercream cake. Smooth metal or plastic scrapers can help you decorate a dessert with sharp edges and smooth sides. For a different look, get a serrated edge scraper, this can help to create a lovely pattern on your cake.

All these are some of the best tools for cake decorating. If you have a list of cake decorating tools to add to this list, please leave them in the comment section.

Some topics in this 'Baking Basic' series are:

Recipe Review: Quick No-Knead Bread- Natasha’s Kitchen

No-knead bread

Have you ever had your best-laid plans go to blazes? That’s how I felt the first few times I attempted this No-knead bread recipe. The problem was not the recipe though; the problem was my yeast. I never thought to check my yeast because each time I baked bread; I opened a new sachet of yeast. 

After my fourth attempt at making this recipe, I gave up and tried other recipes. 
2 weeks ago, I rediscovered this recipe and tried it again. My recipe review is of my successful attempt at making this recipe.

No-knead bread

The recipe and Instructions

This Quick No-Knead bread from Natasha’s kitchen has only 4 ingredients; Water, yeast, flour, and salt. Every baker should have these essential ingredients in their pantry. 

The instructions are easy to follow and very clear. The simplicity of this recipe even makes the all in one method of mixing possible especially if you use a stand mixer. You must avoid placing the salt and yeast together to avoid rendering the yeast inactive. Even better is the fact that no kneading is required. The straightforward recipe and instructions set the stage for simple but epic bread making. 

After the first and second rise, you put the dough in the oven with a cup of boiling water in a pan to create steam. The steam contributes to the formation of delicious chewy bread with a crisp top.

Texture

This bread had an amazing chewy texture considering the fact that no kneading was involved. Despite how crisp and chewy the crust of this bread was, the center was soft. It also reminded me of French bread. 

A day after I made the bread, the crust was not as crunchy but still had a lot of chew to it. The texture was lovely, especially when dipped in tomato sauce, which was the way I ate it. The texture of the bread makes it suitable for piling on toppings, sauces or cheese as it does not get soggy quickly.

Taste

 While this is quick bread dough, the flavor profile does not reflect that fact. The salt was the main seasoning for the loaf and the flavor the yeast provided after the second rise complimented the salt. It may seem like a ton of salt for some to add to add to a bread recipe but this was actually a perfect amount. The flavors of the no-knead bread also paired wonderfully with butter and cheese.

For a better flavor especially in savory dishes, add some dried herbs or crushed garlic to the bread dough while mixing. A few drizzles of olive oil make a lovely addition to this bread recipe. 
For a simple affair, eat this bread with butter.

Quick No-knead bread


Combo

This bread was perfect with a homemade tomato recipe. The saltiness of the bread combined with the acidity, sweetness and subtle spiciness of the tomato sauce provided a flavor bomb. This also tastes good with a mild cheese. 
I recommend mild cheese because a sharp one might add another layer of salt which could lead to a salt overload for your taste buds.

Do I recommend this recipe? 

Yes, I do, it is ideal for the amateur bread maker or busy baker. 
However, you will probably need ½ - 1 cup of flour more than what this recipe calls for. If you use only the amount the recipe calls for, your dough will be sticky, not tacky and unmanageable. The dough will also spread out instead of rising upwards.

Once you have mastered making this recipe, mixing and baking this dough will be a breeze. 

This bread is nothing like commercially made bread so if that is what you are searching for, this recipe will disappoint you. I still encourage you to try this recipe. 

- Substitutions
You can use all-purpose flour if you do not have bread flour.


11 Tips for making amazing caramel sauce every time!

caramel sauce

If you are a beginner baker or do a lot of baking, you have probably come across a recipe that calls for caramel sauce. As delicious as this ingredient is, I never have it in my pantry. It is deliciously creamy and flavorful but quite easy to make.

There are a few mistakes that can make this a daunting task. Here are my tips for making an amazing caramel sauce.

 1.  A well-lit kitchen  is your friend

When cooking sugar without a candy thermometer or by color, do so in a well-lit kitchen. In a dimly lit kitchen, your sugar may look lighter or darker than it is. Also, use a lighter-colored pan so you can see how dark your sugar is getting accurately.

2.    Use a deep heavy-bottomed pot

When cooking sugar, you need a thick pot or heavy-bottomed pans. The reason for this is that the thick pans provide a more even heat distribution. Even heating of the sugar will prevent some parts of the pot from burning faster and ruining your recipe. These pots also have heatproof handles that will let you handle them with ease.

A deep saucepot is also essential.  This will ensure that your caramel does not boil over and burn you.

3.    Read the recipe fully

Caramel is easy to make when you follow the recipe and instructions. Before you start making a caramel sauce, read the instructions and understand the ‘why’ questions. Why should I not stir the boiling sugar? Why should I boil the sugar covered with the pot lid for a little while?

4.    Lay out all your ingredients before you begin

Before you begin cooking sugar, you should measure and set out all your ingredients. Walking away for a few seconds to go get something could result in burnt sugar. Set out all your ingredients close by for easy access.

5.    Newbie? The Wet caramel method is better

There are two methods for making a  caramel sauce, the dry and the wet method. The dry method involves heating the sugar in the pot until it liquefies. This method is faster and the risk of burning your sugar is higher.

 The wet method though involves adding water to the sugar and cooking it. The longer cooking periods causes a better development of flavor. When the water evaporates, the liquid sugar remains.

The wet method of making caramel helps to ensure even cooking and a better flavor.  Beginner bakers tend to have more success with this method.

6.    Low heat is better                           

When cooking sugar, low heat is better. This is because sugar can burn quickly. If you cook your sugar on a low flame, your sugar has a longer cooking time and you will be able to watch the rate at which the sugar browns.  When you are more experienced at cooking sugar, you can do so at a higher heat and have an idea of how fast it takes to make caramel. 

7.    Have a wet brush on hand

If you have gotten some sugar crystals on the sides of the pan, brush the sides of the pan with a wet brush. As the water runs down, it will wash down sugar crystals and cause it to dissolve.

8.    Salt, liquor or flavoring for depth of flavor

Caramel sauce usually contains sugar, butter and milk or heavy cream. To improve the flavor of this sweet treat, add a little salt. If you drink alcohol, a tablespoon or two of rum or brandy can add some dimension to the flavor profile of your caramel sauce. 

Flavoring your caramel sauce also helps it pair better with some desserts.  Add a tablespoon of coconut rum to your caramel sauce for a glaze or drizzle that will compliment a coffee cake beautifully.

9.    Burnt Sugar = Fresh Start

If you burnt your sugar, do not continue with the caramel making process. The result of making a caramel sauce with burnt sugar will be bitter and very inedible. If you burn your sugar, put your pan in the sink, fill it with water and put it back on the stove for a few minutes.

Before you begin the process again, wash your pan properly and get off any burnt residue. It could ruin your next batch of caramel.

10.    Add a little acid or different type of sugar to stop re-crystallization after your caramel is cooked.

A little lemon juice or cream of tartar are some acids that you can use stop the re-crystallization process.  You can replace some sugar with glucose or corn syrup to prevent the sugar from crystallizing while or after cooking.

11. My caramel sauce is too thick when cool, what do i do?

Too thick caramel sauce occurs when you cook your sugar too long. This could also happen in recipes that require you put your caramel sauce back on the heat for a few seconds after adding your butter and cream. To solve this problem, heat up some milk or cream but do not boil it and add your caramel sauce to the milk/ cream. Stir the caramel sauce and milk/ cream till it is fully incorporated and take it off the heat. 

These tips are beneficial in perfecting how to make a caramel sauce. However, one essential tip is to be SAFE. Liquid sugar is incredibly hot and is dangerous when mixed with room temperature liquids.  Do not handle your sauce pot carelessly when making caramel.

If you have some tips for making caramel sauce, leave it it in the comment section, i love reading your contributions.

Recipe Review: Lime curd by Flo Braker

The first baking book I owned was 'The Simple Art of Perfect Baking' by Flo Braker. It was a gift from my mum.

Lime curd

I did not realize the value of this book at the time. It was simply a book with pretty pictures and recipes that I would not bake.
As time went by, this book opened my eyes to the science of baking. To be completely honest though, it is not as simple as she says. You need to read the instructions, follow the directions, put in the arm work and practice.

One of the first recipes I tried from this book was the lime curd recipe. It took a while before I made the recipe and this was because I had tried lemon curd once before and I did not like it. In fact, no one in my home liked it. The problem was that the lemon curd was undeniably eggy.

 A little while later, I was looking through this book and I found a lime curd recipe that the writer promised would not be eggy. Spoiler alert: She was right!!!
I have made this recipe multiple times and can now write a review on it.

The recipe and instructions

The recipe for the lime curd calls for the basic ingredients used to make a lemon curd. Eggs, egg yolks, lime zest, lime juice, sugar, and cold butter. The instructions for this recipe are clear, easy to understand and follow. 

Making the lime curd recipe by Flo Braker involves adding all the ingredients to a saucepan, putting it on a low heat and stirring until the mixture thickens. It is a one-pot recipe that does not involve the use of a Bain-marie (water bath).

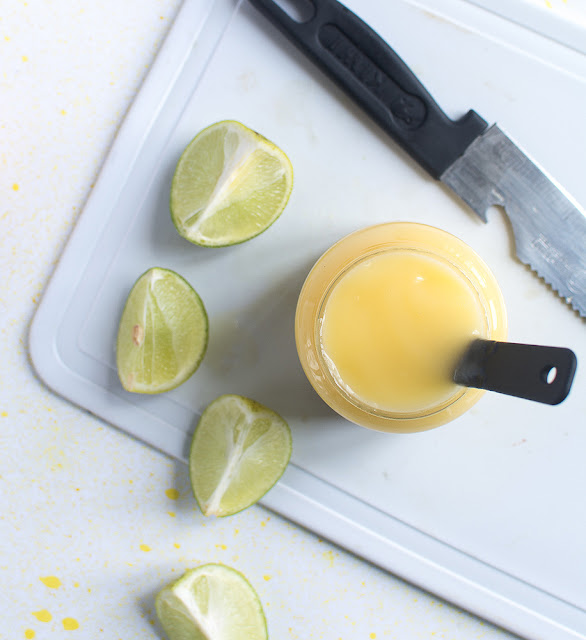
limes

The texture

Immediately after taking the lime curd off the stove, the lime curd is thick but still liquid enough to pass through a strainer easily. After the lime curd has cooled down, it will thicken. 

When sieved, the lime curd has a silky texture and smooth mouth-feel. If you do not sieve the curd though, it is not very silky because of the lime zest still in it.
If you cook this too long or at a high heat and the eggs scramble, the texture of the lime curd is unappealing and grainy. 

Lime curd

The Flavor

The flavor of this lime curd can be described as tangy and sweet. It is not tart enough to make your mouth pucker. The butter also provides another layer on the flavor profile.  However, the taste of the butter is not enough to overpower the freshness of the lime. Importantly, the flavor that the butter provides cannot be replicated with margarine. 

Do I recommend this recipe?

Yes. This lime curd is pleasantly sweet without being too sweet or sour.

Tips for making this recipe

  • Use a heavy-bottomed deep saucepan. Due to the nature and instructions for cooking this recipe,a thick pot is necessary to ensure even cooking. 
  • Use a very low heat to cook this recipe. On medium or high heat, you risk cooking the eggs.
  • If you cook the lime curd recipe on low heat, cook it until it has just thickened. If you cook it much longer, you will scramble the eggs.
  • In case you curdle the eggs, I recommend scrapping that batch of lime curd. If you sieve the lime curd, it becomes grainy and tastes eggy when it cools down.
  • Cover your cooked lime curd with Clingfilm touching the surface of the curd to prevent a skin from forming.
  • Cool the lime curd fast by putting it in a large bowl or pan. Then, put the bowl in the fridge or in a larger bowl with ice in it. 
  • Incorporate a different flavor into this recipe by including some grapefruit or orange zest.
  • If you have problems with cooking your lime curd using direct heat, cook this same recipe using a Bain-marie method. This slows down the cooking and reduces the possibility of curdling. 


10 Tips for Beginner Bakers

Baking can feel like a daunting task sometimes but it does not have to be that way.


There are a few mistakes you can make when you start baking. These mistakes  can limit your success in the kitchen. Here are a few tips for beginner bakers that are sure to help you in your baking journey.

1. Start simple and learn the basics

Start baking simple recipes and learn the basic techniques. This will make applying them to advanced or expert level recipes easier.

Importantly, starting with simple recipes will help you feel accomplished when you make them successfully. This success will encourage you to bake more and try new recipes. 
Successfully baking a pound cake could encourage you to try an angel food cake recipe.

 2. Always bake with room temperature ingredients except if the recipe calls for otherwise. 

A lot of recipes call for room temperature ingredients.  This makes ingredients easier to mix and ensures better creaming of butter and sugar in cakes. Room temperature egg whites whip up faster as well.

Furthermore, when you put a cold batter in the oven, the baking process does not start immediately as the batter first has to come to a room temperature. Cold cookies dough does not spread as much room temperature cookie dough. The importance of the temperature of baking ingredients cannot be underestimated.

3. Weigh all your ingredients.

This is an especially important tip for beginner bakers. You should get a digital scale for this purpose. It may surprise you how much the weight of flour can change when measured with cups. The weight can vary by as much as 5 — 30grams or more if you do not measure properly. 

Weigh your ingredients for consistent and specific results at all times. Precision baking provides amazing results. 
Weighing ingredients also make it easier to scale down a recipe. It is quite hard to measure a 1/8th cup of flour precisely but you can weigh a 1/4th of a cup and divide the weight by 2 to get a 1/8th of a cup.

4. Mix smaller quantities by hand.

Baking is now incredibly convenient with the use of stand mixers. When testing new recipes and baking small quantities, mix them by hand. This is for a few reasons. First of all, you will be able to tell the proper texture of your dough or batter especially if you are trying a new recipe. 

Secondly, you will not over mix your batter or dough. It is easy to over mix a small recipe when you use a mixer.

5. Follow the recipe. 

As obvious as this may seem, a lot of amateur bakers do not follow this tip. To bake amazing treats, read the recipe and instructions once before you bake.
So, you have mixed a dough and it still seems sticky, unless it calls for it, do not add flour. Not following the recipe properly the first time you make it is a path to baking disasters. Seasoned bakers can change things up the first time they make a recipe because they are familiar with baking ratios. 

Also, some seasoned bakers have a good knowledge of baker’s percentage and can alter recipes using this guide.

6. Learn about baker’s percentages. 

Baking is a science. Reading about baking formulas and the ideal percentage of each ingredient relative to the amount of flour in a recipe will positively affect your baking. While it is not compulsory to study baker’s percentage, this knowledge will help you when you are changing up recipes to suit your needs. 
Read about Baker's percentage here and here.

7. Do not use ingredients of inferior quality

 When you bake, you are bringing together a few or many components to create something beautiful. It may be tempting to use the cheapest products but do not do this. You do not need to buy the most expensive items, just the best quality you can afford.
Poor quality ingredients can make even the best of recipes seem subpar or just unappealing. Do not take the time and effort to make a recipe and have it diminished by inferior products like bad cocoa powder or grainy icing sugar.

8. Mise en Place (everything in its place) 

Arrange all the ingredients of the recipe you wish to make before you start baking. This helps to ensure you do not make mistakes with your measurements while baking. It also helps you ensure that you have all the essential ingredients needed before you start baking.

9. Plan ahead

When I started baking, I realised quickly that one problem I had was my lack of planning and organization. Planning eliminates the rush that could contribute to baking fails. When you plan ahead, it is unlikely that you will measure ingredients wrongly, run out of things you need. This is a tip I wish I had when I started baking.

10. Get a baking diary.

To improve your baking, I recommend getting a diary for the sole purpose of documenting your results. Alongside the outcome of your baking, note the mistakes you made and identify possible ways of improving your baking.

Aside from improving your baking, a diary is also a journal or your journey. It will help you see if your baking is improving and how it is getting better. Significantly, you will be able to tell if you are expanding your baking horizons when you look at this diary.

 If you have not made any recipes that challenge your baking expertise, this diary will tell.

These 10 tips are things every amateur baker should know. These tips will not only help you have fewer kitchen disasters but will also help you advance in your baking. 

If you have any other tips for beginner bakers, leave them in the comment section.

Recipe Review: Chocolate Biscotti recipe by Happy and Harried


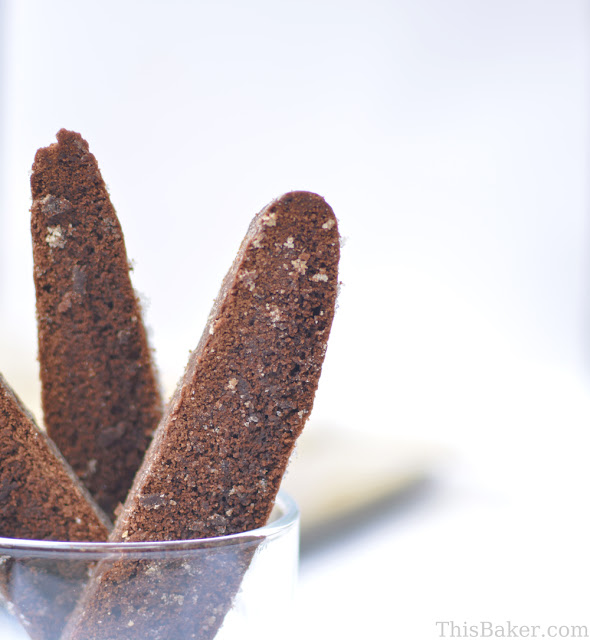
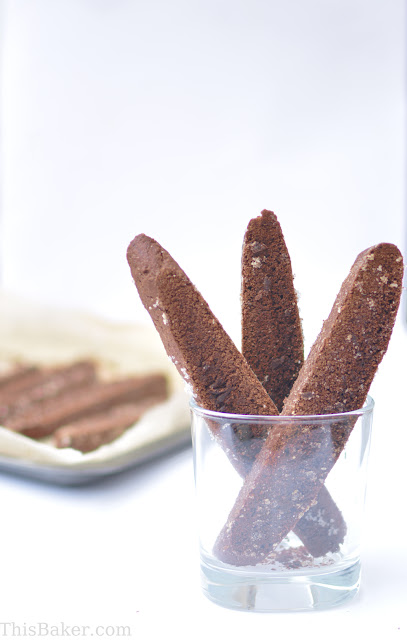
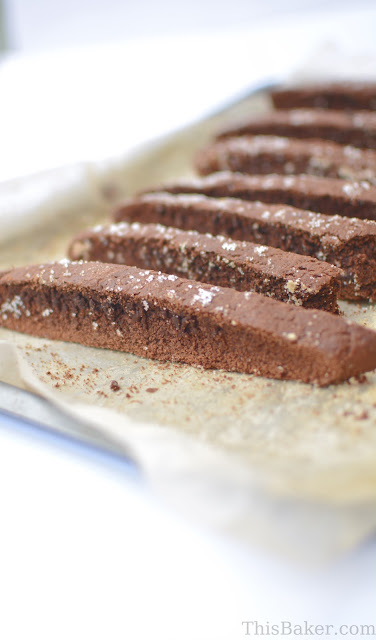
Chocolate Biscotti


After making the vanilla biscotti recipe by BunnyBaubles, I began to search for a chocolate version. I do not love chocolate desserts because they are either too sweet or not chocolatey enough. The idea of a chocolate biscotti appealed to me though because of my obsession with coffee.

I drink a ton of coffee and what better to pair it with than a chocolate cookie. I did not want a biscotti cookie with chocolate chips in it but wanted a depth of chocolate flavor. The recipe I chose to try is the Chocolate Biscotti recipe by Happy and Harried.

Chocolate Biscotti

This recipe stuck out because it is very similar to the vanilla biscotti I reviewed earlier. The difference between the two recipes is ½ a cup of cocoa powder.  Before baking this recipe, I felt that the addition of cocoa powder without reducing the amount of flour would create a dense cookie.

Just like the plain biscotti recipe, mixing this recipe is simple. To make this recipe, you:
Cream the butter and sugar, mix in your eggs, vanilla extract and coffee/ espresso extract. After you mix in the flour, cocoa powder, and baking powder. The dough of this cookie is not sticky, just a little tacky. Shape this dough into a log or two on a parchment lined cookie sheet and bake for 20-25 minutes.

 After baking, bring the cookie sheet out and cut logs into diagonal strips using a serrated knife. Arrange the cookies cut side down on the cookie sheets and bake at a lower temperature for a few minutes. I like to flip the cookies upside-down halfway through the second baking period.

I made this recipe 2 different ways:

  • As the recipe was written
  • With a reduced amount of flour
Chocolate Biscotti

  • Making this recipe as written


The first time I made this chocolate biscotti recipe, I followed the recipe and instructions without changing a thing. The dough was tacky but not at all sticky. Shaping this dough into a log was very easy as well. I cut my chocolate biscotti logs into ½ inch wide stripes and baked them for the second time.
 After they were cool, they were hard. These cookies were noticeably denser than the vanilla version I previously tried.  They were crisp and had a nice snap when broken. The flavor of these was delicious. The chocolate flavor was very prominent and the addition of the coffee made it even more delicious. 
I  did not love this recipe the day I made it but on the 2nd day, they were more enjoyable. I believe that the flavor profile was a bit more developed. 

The best way I can describe these is to say that they tasted like speedy biscuits I ate while growing up (Nigerian folks should know speedy biscuits).

  • Using a smaller amount of flour


I found the original recipe a little dense because I prefer a lighter biscotti. I chose to reduce the flour in the recipe by the amount of cocoa powder added. The dough was sticky and I placed it on a cocoa dusted parchment sheet and toed it with a dusting of cocoa powder as well. 
The outcome was a light, crunchy very intensely flavored biscotti cookie. This variation held up well when dunked in red wine. Even after dunking, it did not get soggy. 

The reduced amount of flour did wonders for the taste of this cookie. The best description of this would be a brownie biscotti. I feel like adding chocolate chips to this would be an overkill. I prefer the reduced amount of flour and will recommend that you follow this variation.

Do I recommend this recipe?


Yeas I do. This chocolate biscotti recipe is simple to make and store. It is practically foolproof. Once ,I threw the butter, sugar, and eggs into a bowl and mixed it. I made the rest of the recipe as was written and it still worked out. I also made this with cold butter once because I did not want to wait, there was no difference. Whether you like a dense or airy cookie, this recipe will work for you.

Tips for working with this recipe

-To enhance the chocolate flavor, use coffee extract or espresso powder
-Dust the top of your biscotti logs with cocoa powder for an even more intense chocolate flavor.
-If you reduce the amount of flour in this recipe, the biscotti logs will be delicate.

Recipe Review: Sesame Snaps by Not quite Nigella.

Sesame snaps are one of those treats that are addictive...immensely so.

Not quite nigella sesame snaps


My introduction to sesame seeds came when I was very young. My mother would buy roasted sesame seeds for my brothers and me, we would eat them with roasted groundnuts. I thought they were beniseeds for the longest time.

I tried sesame snaps for the first time while I was getting my master’s degree in Coventry, UK. My aunt who worked in the area took me to the stores in the morning and showed me a roll of sesame snaps. As we were leaving, she gave me a packet and, my love for sesame snaps was born.
For those who do not know what sesame snaps are, these are toasted sesame seeds mixed with caramelized sugar (sometimes honey).

This mixture is rolled thin and cut before it gets cold. After it cools down you are left with a brittle that has a snap (sound) to it when you bite or crack it. Sesame snaps I believe can be called sesame brittle too.

After leaving the United Kingdom, I craved sesame snaps and decided to make them myself. My first attempt was using a recipe from  Not Quite Nigella .

sesame snaps

The recipe

The sesame snap recipe was simple, and the instruction was quite easy to follow. After caramelizing the sugar, add the sesame seeds to the sugar and stir. After it is fully incorporated, pour the mixture onto a baking sheet and spread it out quickly. Cut your sesame sheet into squares or wait till your sesame sheet is cool and break it into shards.


The texture

These sesame snaps are crunchy and crisp. The cooked sugar makes this brittle and the sesame seeds provide the crunch. If you do not caramelize the sugar properly, your sesame snaps will have a leathery texture that does not have the signature snap. The thinner you make these, the better the texture in my opinion.

The Flavor

The flavors of these sesame snaps are quite distinct. It is Sweet yet very slightly bitter from the caramelized sugar. The nuttiness of the sesame seeds and the hint of vanilla pair beautifully together. For a deeper flavor profile that is not cloyingly sweet, toast your sesame seeds before using it and caramelize your sugar till it is a dark golden brown but not burnt.
Side note: I loved the results I got when I made these for the first time. However, my sugar and sesame mixture cooled quickly the first time I made these leaving me with sesame snaps thicker than I like them. 

My second attempt was a breeze, and I had very thin sesame snaps this time. The sesame snaps I made with this recipe were sweet. My brother had one, then another and after 30 minutes of sitting by the dish, he said that he was tired of chewing but just could not leave the snaps alone. I did notice however that these sesame snaps remain a bit sticky. 

If not all the snaps are eaten on the same day, I recommend wrapping each the brittle in parchment paper and putting them in an airtight container.

Note: This recipe called for orange blossom water, I did not have any and was not going to buy any because of 1 recipe so I used vanilla as recommended and it was amazing.

After making these snaps a few more times, here are some tips I have picked up that will ensure success in your sesame snap making ventures:

  • Use a heavy-bottomed saucepan: The use of a heavy-bottomed saucepan is essential any time you are cooking sugar as it provides even heating and reduces it the possibility of hot spots which could lead to burnt sugar on a side of the pot and not on the other.
  • Never walk away: Sugar burns so quickly do not walk away.
  • Prepare all your tools before you start: When working with sugar, you should prepare all the equipment beforehand. This reduces the possibility of burning sugar or sesame seeds while prepping.
  • If you wish to get a very thin sesame sap, heat a large flat oven tray in the oven. When you are done mixing your sugar and sesame. Bring the oven tray out of the oven, place a parchment sheet on top it and pour your sesame snap mixture onto the parchment. Place another parchment sheet on top the sesame snap mix (it will be incredibly hot, be careful). Quickly roll the sesame snaps between the two sheets of parchment paper, the hot tray underneath will allow the sugar, sesame mix stays hot longer and this will give you a bit more time to work on your snaps.
  • Try the wet caramel method, if you want more control over how fast your sugar caramelizes, the wet caramel method is ideal. Check out other benefits out using the wet caramel method in this post.


Do I recommend this recipe?

Yes, I do, this is a must-try for all sesame snap lovers. Eat them as they are, use them as a topping or use them to infuse ice cream base, these treats are lovely and loved by many. 

Get the Sesame Snap recipe here

Essential Baking Ingredients Every Baker Should Always Have


essential baking ingredients

I do most of my baking between 12 am and 6 am because it’s quiet. However, when I get the baking itch, the worst thing that could happen is finding out I do not have the ingredient I need at home.

There are some essential baking ingredients you should always have on hand. They are easy to store and are used in almost any dessert recipe. It is important to note that this list may not apply to you if you have special dietary requirements. If you are eating a low carb, vegan or gluten-free diet, you will have to adapt this list to fit your needs. 

Also, you must store your ingredients properly to ensure they are of the best quality possible when you use them.   

Sugar

 
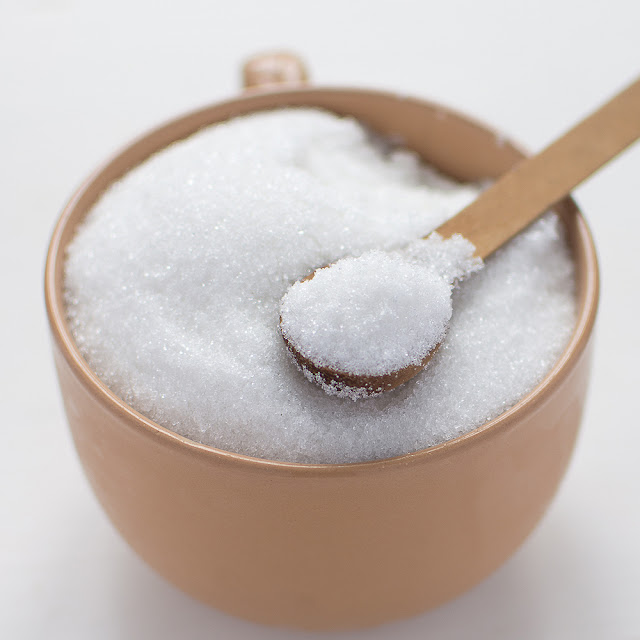
sugar

Nearly every dessert has sugar in it. If you want only one type of sugar in your pantry, get white sugar. However, if you have space and storage containers, light or dark brown sugar, muscovado sugar and icing sugar will make excellent additions to your pantry.

Other sweeteners like honey, golden syrup, and sugar-free sweeteners are also important baking ingredients. 
Store these items in dry, tightly closed containers to keep out extra moisture and insects.

Butter, Margarine, and Oil

 Butter and oil


I always have these items on hand. Depending on your needs, you should get any of these items and keep them in your fridge or freezer. I usually stock up on butter when it is on sale and keep it in the freezer.

 Some recipes call for oil so always keep some in a bottle in your kitchen.  I bake with the same brand and type of oil that I use to cook so I never run out. 

Flour

 
flour


The is one essential baking Ingredient that cakes, cupcakes, pies, tarts,  pastry and most desserts have in common. Keep white flour on hand at all times. If you have space, make sure you have cake and bread flour on hand as well.

I do not recommend stocking up on nut flours except you know you will be using them ASAP. Nut flours could go rancid so buy them when you need them. Depending on your needs you may need specialty flours like double zero flour, whole-wheat flour etc. 

Decide on what flour you use the most, stock up on it and store it accordingly.

Eggs

 eggs

Recipes that have no eggs In them are available online. However, you can keep eggs in the fridge for recipes you like to make or want o test. The roles eggs play in dessert recipes cannot be underestimated. For an in-depth understanding of eggs and the role they play in baking, check out this page.

Milk

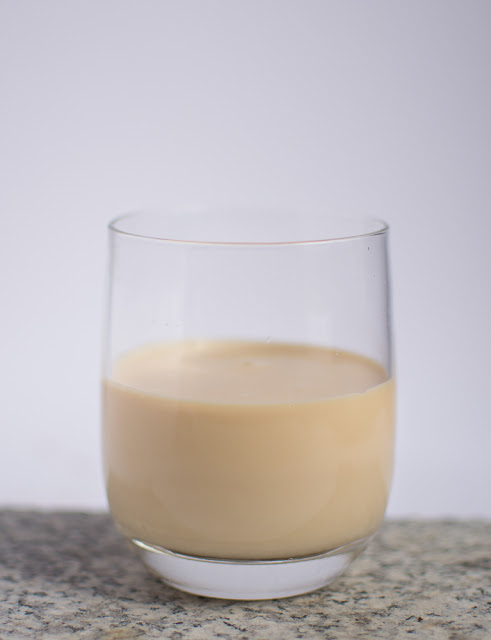
milk


Dairy products are a common addition to a lot of baked recipes. However, while a ton of cake recipes include milk and others call for buttermilk, not all dessert recipes include heavy cream or half and half.  This is why I focus on milk as an essential baking ingredient in the list. Have milk in your pantry or fridge at all times. You can also use milk instead of buttermilk in some recipes.

In the absence of buttermilk, add 1 tablespoon of vinegar to a cup of milk to make a passable replacement. 
I use liquid evaporated milk and powdered milk to bake. Both of which are quite easy to store for a reasonable period of time.

Baking powder and baking soda

 
Baking powder and baking soda

I am never without baking powder or soda. Raising agents are a common addition to dessert recipes and so I always have them available. Due to the nature of these products, I prefer to buy smaller cans. 

This way, I open a newer can of the raising agents often instead of having a larger can open for a long time. I am assured of the freshness of my baking soda and powder when I use smaller cans. To store these in your pantry, keep them in an airtight container.

Yeast


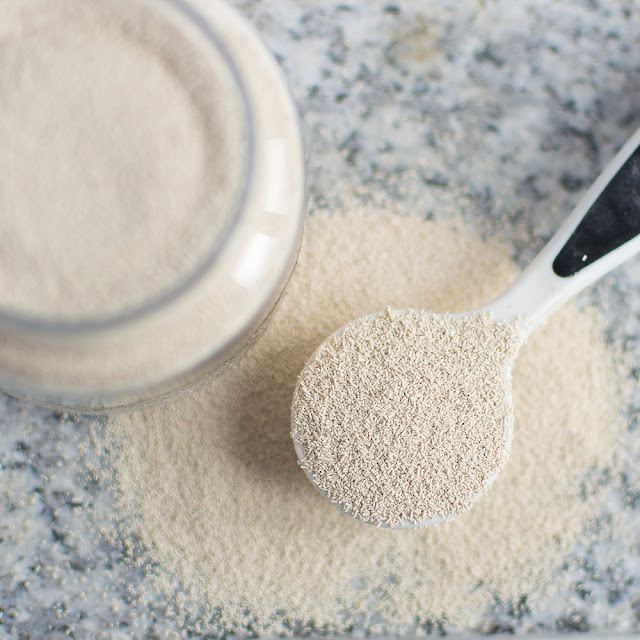
Yeast

Someone told me ‘I can bake an amazing, moist and fluffy cake without baking powder but what is bread without yeast? ’. If you do a lot of bread making or enjoy making yeast products, this ingredient is necessary.  

Always check your yeast to make sure it is still fresh and works. You could also stock up on sachets of yeast that are perfect for a single use.

Cocoa Powder

 
cocoa powder

I think I am yet to find a chocolate cake recipe that blows me away. Still, I sometimes crave brownies or something chocolaty and because of that, cocoa powder is always in my cupboard. Aside from baking with this item, cocoa powder makes an awesome hot chocolate drink superior to any sugar loaded chocolate mix. 

To store this item, I simply put it in an airtight canister.  This is an essential baking ingredient for every chocolate lover.

Dried or Frozen fruits

 Dried cranberries

Dried fruits like cranberries, raisins or blueberries make an excellent add-in to cakes, cupcakes, bread, and pancakes. They make a beautiful addition flavor wise and texture-wise to simple baked items. 

Frozen fruits are also great for later use. Freeze bananas, ripe pineapples, berries when they are in season or just ripe and defrost them to use in your desserts.  

Baking chips and discs

Baking chips are not limited to chocolate chips. Caramel, butterscotch and even cinnamon chips are delicious ingredients for the avid baker. All these can be used in numerous desserts. 

The only problem is storage in warm weather. Because of this, I store my baking chips in the fridge. However, if the weather is not a problem,  you can store them in airtight containers at room temperature.

Extracts, Flavors, and Spices

Extracts and flavouring


Always have some pure extract, flavorings, and spices in your pantry. These can help you create flavorful desserts.

If you have the extra space, you can add more items to your list of essential baking ingredients. 


Tips to ensure you never run out of essential baking ingredients

1.    Use transparent storage jars. This will help you keep track of what you have left. Also, repeatedly seeing a nearly empty jar will help you remember to buy what you need.

2.    Keep a list. The simplest way to always keep your baking pantry stocked is by making a list. As soon as you run out or are almost out of a baking ingredient, add it to the list. On your phone, make the list a sticky note if possible. 

3.     Keep everything where you can see it. All the baking ingredients you use often should be in a place where you see them easily. If you keep the baking powder in the back of a drawer, the chances are that you will forget to repurchase it when it is almost empty.

4.    Purchase your essentials in bulk.  Instead of buying a 2lb bag of flour, get a 5lb bag especially if you have the storage space. Buy items that can be stored easily in multi packs or large quantities.

I hope this article has been helpful in letting you know what essential baking ingredients every baker should always have. If there are other items you wish to add to the list, leave them in the comment section.
Professional Blog Designs by pipdig