Recipe Review: Best brownies by Allrecipes (Angie)

 Brownies are not my favorite dessert because there are too many variations to choose from and I have yet to find the one I love.                                            

           Brownies


Somewhat surprisingly, I had my best ever brownies on a  plane and despite my attempts, i have been unable to recreate the recipe.
I chose to review this recipe because of it's name. ‘Best brownies’.  To be completely honest, I was skeptical because what is best for you, may be subpar to me but that is another story.

Almost no one in my home likes chocolate cake. It is weird but true. For this reason, brownies are not a popular item on the dessert plate. However, I have been searching for a brownie recipe that would convert everyone.

I opened Google and searched for brownie recipes and this came up. Apart from wanting to see if it lived up to its name, I tried this recipe because of how many reviews it had received.  A couple thousand people cannot be wrong. Right?

                    Brownies

The Recipe

The recipe for the best brownies was basic and i had all the ingredients on hand. However, I came to discover that this was the Hershey’s best brownie recipe as well. I divided the recipe in half and mixed up the batter. The batter came together quickly, it was a one-pot recipe. I put the batter in a loaf pan and  I baked it in the oven for 30 minutes before it was done. Halfway through baking, I took the loaf pan out of the oven and rapped it on the counter.  

 After the brownies were done, they did not have the crackly signature brownie top.  Immediately I touched the tops of these brownies, I could tell that they would be really soft.  A few minutes after taking the brownies out of the oven, I put some caramel chocolates on the top and I put the brownies in the fridge for 30 minutes so they could get firm.

After chilling the brownie, I went on to cut the brownie into squares and it was hard to get a clean cut. This is because of how delicate this brownie was. I recommend dipping your knife in hot water and wiping it off for a cleaner cut. 

The Texture

This best brownies recipe produced a light and delicate brownie that I believe was more cake than a brownie. It was almost a contradiction of what a brownie is supposed to be because it was not dense or chewy. 

The brownie was still mildly fudgy but not enough to be called an authentic brownie. Texture wise, I could pass this off as a chocolate cake. One of my taste testers said he enjoyed ‘this chocolate cake’.

          best Brownies

The Flavor

The flavor of these brownies was very chocolaty but not so much that it was bitter.  It was sweet but not cloyingly sweet. Adding the caramel chocolates made it sweeter but the addition was not necessary. I only added it because I  love caramel and chocolate together.

Overall, I did not find this to be the best brownies ever. It was underwhelming, to be honest. The flavor was lovely but the texture was … not the authentic brownie texture. I thought dense or chewy would be the words I could use to describe this recipe but that was not the case.

Do I recommend the Best Brownies Recipe from Allrecipes?

Not really. With this recipe, it is not a simple Yes or No.
I recommend this recipe if you want a light and delicate cakey brownie. 
If you want a dense, chewy, fudgy brownie, you will not enjoy loving this and I do not recommend it. 

If you have a tip for making awesome brownies, leave them in the comment section below.

Also if you disagree with my review and have something to contribute, leave it in the comments, I  would love to read from you.

Get the Best Brownies Recipe.  

4 Must-Have Piping Tips

Every baker will need to use piping tips or nozzles at some point.

That said, there are many piping tips available but not all of them are great for everyday  use. Some of these nozzles have specific functions that make them 1 purpose items. An example of this is the grass piping nozzle or leaf piping tip.. 


piping tips

I prefer to have piping tips that I for different purposes.
Below is a list of my 'must-have piping tips' for bakers and beginner cake decorators.

  • The round tip

 Available in different sizes, this tip can be used to decorate cakes, cupcakes, pipe pastry, and fill pastries. Wilton 1-12, 1A and 2A are round tips. 

  • The star tip (open and closed)

 Star tips are a must-have piping tip for bakers. Smaller sized star tips are ideal for piping borders, mini flowers, and pastry. The larger star tips are useful for decorating cakes, cupcakes, and piping choux pastry. Wilton 1M, 2D, 14, 17, 21, 22 and 32 are examples of open and closed star tips.

piping tips

  •  The basketweave tip

 This piping tip should be in every baker's kit. The larger sized basketweave tips are great for applying a thick, even layer of frosting on cakes or other desserts. They can also be used to make pipable butter cookies.  The small sizes of the basketweave tip can be used to make basketweave patterns on cakes, cupcakes and to make meringue cookies. Wilton 46, 47, 2B and 789 are basketweave tips of varying sizes. 

  • Petal piping tips

If you are going to be piping flowers, you will get the best use out of this piping tip. The petal piping tip can be used to pipe sweet peas. Roses, ranunculus and a few other flowers you can decorate your desserts with. Wilton 102, 104, 124, 125 tips are petal piping tips.

The piping tips listed here are from Wilton but other brands like Ateco and Tala have similar piping tips. If you are unable to find either brand, search for unbranded piping tips with a similar shape like the one you are looking for. 


piping tips

How to care for your piping tips


I have had my piping tips for years, along the way I have lost some due to improper care. Here are tips for caring for your piping tips and ensuring that they last longer. 

1.    Start by buying good quality icing nozzles. These are relatively cheap, so buy the best quality you can find. Wilton and Ateco are my favorite brands. One problem with buying poor quality nozzles is that their construction is shoddy. The tips may have ragged edges and this  affects  how the buttercream looks when piped out.
Furthermore, poorly made piping tips bend and lose their shape if the slightest pressure is applied to them. 
It is much easier to care for better quality piping tips. 

2.    Do not soak your piping tips for long periods. 
It is quite understandable that you may be too tired to wash your piping tips immediately after using them. However, unless you will be washing them soon after, do not soak your piping tips in water. This could cause the quality to deteriorate over time.


piping tips


Below are a few resources if you want to know more about piping tips

Piping Tips 101 + Video

HOW TO USE PIPING NOZZLES (BOLD BAKING BASICS)


Recipe Review: Country White Bread by Taste of Home

I love white bread but hate making it. I have tons of bread disaster stories under my belt.

Country white bread

 Since I am talking about it, here's a short story. When I just got into baking, I felt baking bread would be awesome and somewhat easy. I woke up one morning, got my ingredients together and began mixing.

There were numerous issues I see now which i did not notice previously. The recipe I followed was not very clear, it also called for strong bread flour which I did not have. I began kneading  by hand because my hand mixer was too weak for mixing the dough.

After I started kneading, I was to add some parsley or basil (not sure anymore). Instead, i added some chopped arugula, instead of the parsley or basil i had kept by the side. It took me a few minutes to realize what I did and till today, I can only blame the long kneading process for blocking my reasoning.

Back to the recipe.
My mom bought me 2 large Taste of Home cookbooks and I saw a country white bread recipe in one of them. The simple instructions and easy to find ingredients drew me to this bread recipe. Coincidentally, I had all the ingredients in my pantry so I made this recipe.  

Country white bread

Here are the different ways I made this recipe and the results i got.

  •  Baking the exact recipe
  • Using bread flour
  • Increasing the yeast in the recipe
  • Adding raisins
  • Using toppings

  • Baking the exact recipe

 This bread recipe is very basic and simple to follow. The ingredients are things that I am quite sure you have in your pantry. The recipe can be easily divided if you want just 1 loaf of country white bread.

Making the bread recipe as directed gave me a fluffy white bread. Perfect for making sandwiches, spreading on jam, and any other condiments that may come to mind.

The flavor of this bread though was lacking. I can eat bread without any spreads but this loaf of bread was practically crying out for some Nutella or sharp cheddar and tomatoes.

  • Using bread flour

 The first time I made this country white bread recipe was with bread flour. I did not want the flour in my pantry to expire so I made use of it.

The resulting bread was tall, fluffy and had a close texture (no large holes). The problem though was that the bread was flavorless. I realize that is suitable as a sandwich bread but I still thought it would have some sort of flavor. That said, it was still eaten pretty quickly in my home.

Country white bread


  • Increasing the yeast in the recipe

I made this recipe with more yeast than suggested once. The recipe calls for 1 7g package of yeast per loaf. The problem though was that I had a 10g package.

The bread dough rose too fast. The 2nd rise was even faster. However what I got with a fast rise time significantly reduced the flavor of this already flavor lacking bread.

  • Adding raisins

My mom loves raisins in her bread so I made this country white bread with rum soaked raisins too.

After deflating my dough after the first rise, I sprinkled rum soaked raisins on my dough and rolled it up. I was afraid that my dough might get soggy because of the soaked raisins.

This dough did not change though. This white bread baked up beautifully. However, i did not use a ton of raisins, i used about ¼ cup of raisins.

  • Using toppings

 I decided to try adding toppings on this country white bread. Initially, i used sugar chunks and granulated sugar, the result was a caramelized top that did not burn. A light sprinkling of streusel pressed on the dough also gives it a crunchy, butter flavored crust.

 On the other hand, rubbing butter on the top of this bread after taking out of the oven is amazing. It was slightly salty but nicely flavored.

 Add the toppings after the first rise and lightly press the toppings into the top of the dough.

Overall Observation

This country white bread recipe is easy to make but it is not my favorite. If you are looking for a simple white bread that you can use as a flavor carrier, you will love this recipe.

However, if you are like me and you prefer sweeter or better-flavored bread. This recipe is not for you.  You could try a sweeter bread dough recipe or a bread dough with longer rising time or even aromatics.

All this taken into consideration, this bread did not last 4 hours in my home.

I recommend that you try this recipe, especially as a novice baker. This is a great stepping stone to baking other yeast goods.

8 Tips for Storing Baking Ingredients

If you do a lot of baking, you probably have ingredients you use regularly in your pantry.  It is important to store your baking ingredients properly so that they are in the best condition possible when you bake with them.

How to store baking ingredients


  Improperly stored ingredients could become stale, ineffective or prone to insect infestations. Here is a list of essential baking ingredients you should always have in your pantry.

8 tips that can improve how to store your baking ingredients

1.    Store your baking ingredients in transparent airtight canisters.

Do not store your baking ingredients in the bags they come in. Store all your baking ingredients except extracts in transparent airtight containers.

Using airtight containers will prevent your ingredients from being exposed to humidity or open air. Exposure to humidity can compromise the quality of your ingredients, alter their composition and even make them go bad faster.

Using transparent containers will help you see how much of an ingredient you have left. These storage containers will also help you tell what item is a container.
 
Aside from the practical benefits of using transparent containers, these containers are pretty to look at and offer a breezy aesthetic.

2.    Store oils in glass bottles

Pour your oil into glass bottles with tight screw on lids for proper storage. Not storing your oil properly could lead to oxidation, deterioration of its quality and even make it rancid.  Keep your oil away from direct sunlight in a dark bottle or inside a dry cupboard.  

Storing oil in plastic bottles is not recommended. This is because the plastic container can affect the taste of the oil.

3.    Label  your canisters

Another tip for storing baking ingredients is to use labels. THIS IS ESPECIALLY USEFUL WHEN YOU HAVE DIFFERENT VARIETIES OF A PARTICULAR ITEM.  The use of labels will prevent mistaking one ingredient for another while baking.

If you keep all-purpose flour, cake flour, pastry flour, bread flour and cornstarch in your pantry, label the containers you keep them in to avoid any confusion.

4.    Keep your commonly used ingredients in the front row.

Always keep the ingredients you use the most in the front. In my baking shelf, the ingredients in the front are flour, dried fruit, baking powder, baking soda, cocoa powder, yeast, Vanilla extract, and corn flour.

By keeping these in the front, I do not have to rummage through my very deep shelf to find what I need.

Not only is it incredibly convenient for the everyday baker, but it also prevents a mess from being made and helps you see immediately when you run out of baking essentials. Here is a list of essential baking ingredients, you should always have.

If your shelf or cupboard is not deep, simply keep your baking ingredients closest to where you can reach them.

5.    For items like nuts, keep a tag stating when it was opened.

Baking ingredients usually last a while before their quality is compromised. However, some ingredients like nuts can go bad if left at room temperature because of the oils in them.

If you will not keep these ingredients in the fridge or freezer, take note of the day you opened the item and attach a use-by date so that you remember to use up the ingredient before it goes bad.

6.    Improvise with storage containers

While having many ingredients on hand is convenient, getting storage containers for every item in a large baking pantry can get expensive.   To make storing your baking ingredients cheaper, repurpose glass containers or canisters. 

This is a great tip if you do not mind having mismatched storage containers. Former mayo or peanut butter jars are great for storing baking ingredients.

Scented candle jars are great for storing ingredients as well.  I find that Yankee candles and Village candles have the perfect jars for storing baking essentials.

7.    Use a turntable or lazy Susan

If you have a deep or dark cupboard, using a turntable will help you see everything better. Put the items you would like to have in rotation on the turntable. When you need to search for something, simply spin the turntable. This will prevent items from getting lost in the back of your cupboards.

A lazy Susan without a tall stand is best. In addition, the turntable to be used for this purpose should be of good quality.

8.    Spice racks are a valuable storage tool

Spice racks are a great tool for storing smaller baking ingredients.  To store sprinkles, baking spices and extracts, place them in suitable containers and store them in the spice rack.

If you prefer, you can get a rotating spice rack, and replace the spices in these racks with smaller baking essentials like baking powder, baking spices, baking soda etc.


These tips will help to ensure your ingredients are of the best quality when you need them. Following these tips will also help you avoid running out of ingredients and will minimize wastage caused by expired or rancid products.

If you have some tips to add, leave it in the comment section. I love to read from you.


Recipe Review: Chocolate Stout Cake by The Beer Journals


My relationship with stout is very love-love and stout is a beverage you either love or hate, I rarely see anyone who is In the middle. Why? The flavor of stout is too bold to be disguised most of the time.

I recently started researching baking with beer and I found this chocolate stout cake recipe by The beer journals. This recipe had no reviews so I decided to make it and see how it tasted.

                                           Chocolate Stout Cake

A few things made me want to make this recipe. These things made me curious to see how this cake would turn out. First of all, there is no butter or oil in the cake batter. While i was making this cake, I checked the ingredients list multiple times to ensure that I did not leave out the butter and oil by mistake.  The second thing that drew me in was the use of the all-in method of mixing.

I divided the recipe into half and baked the batter in a half loaf pan.

Chocolate Stout Cake


The recipe and instructions

The ingredients in this recipe are very similar to that of a simple chocolate pound cake without the milk and butter but with a bit of stout. The instructions involved mixing all the ingredients minus the stout.

 The instructions states that the stout should be mixed into the dry ingredients gradually. After mixing up the batter, I poured it into a prepared baking tin and baked it for about 35 minutes.

The cake rose and had a prominent dome. From the appearance, I had high expectations for this recipe.

While the cake was cooling I decided to make a glaze. I discarded the one that came with the recipe and made a lighter glaze of icing sugar, stout and milk.

Chocolate Stout Cake

The texture

The texture of this cake was incredibly disappointing. It made me go back to the recipe twice to make sure that I did not leave anything out. The rise of the cake was deceptive as this cake was neither fluffy nor airy.

Instead, it was a mix of slightly soft but dense with a bit of chew. None of my taste testers enjoyed the texture of this cake. The only thing I could do to try and redeem this cake was to drown it in the glaze. The glaze helped to soften the texture of the cake and make it less chewy.

The taste

The flavor of this cake was okay. I could taste the stout but in a very subtle way. If I did not bake the cake, I would not think there was stout in this cake.

The maltiness of the stout complimented the chocolate cake and gave the chocolate flavor more depth. The stout created that unknown flavor that could make people ask for your recipe.

Do I recommend this recipe?

No.
I will not even try to justify this verdict because I think it is self-explanatory. The flavor is the best part of this cake but it is impossible to fully appreciate the flavor if you cannot move past the texture.

I believe there are many chocolate stout cakes that will yield better outcomes. When I find one, I will inform you all.

Don’t forget to comment and subscribe!


Holiday Eats Series

caramel cake


So... we are entering the long holiday season and I will be reviewing a lot of baked goods. Especially baked goods that I feel will  make  lovely gifts and desserts during the holiday season.

I hope to post 2 recipe reviews a week but if I can’t, I will just post one thorough recipe review during the week. I will rate these the same way I rate regular recipes, I just feel these are more holiday appropriate.

To see all the recipes I feel are holiday season appropriate, click the 'holiday eats' label at the bottom of the page.

Subscribe to get updates on new recipes that I try out. Subscribe to this baker’s social media accounts to stay in touch.

If there is a recipe you would like me to try, leave it in the comment section. I love to hear from you.

Recipe Review: Perfect vanilla cupcakes recipe by Glorious Treats

I have searched for a perfect vanilla cupcake recipe for years with no luck. 

Perfect vanilla cupcakes


My idea of a vanilla cupcake is a moist cake with a prominent vanilla flavor and a delicate crumb. The chief requirement I have, is that a vanilla cupcake recipe should not require using a mixer.

In my opinion, a vanilla cake should never be dense, it should be fluffy, airy and have a moist crumb.
This is the same expectation I have when I try a vanilla cupcake recipe.

Almost a year ago I came across the 'Perfect Vanilla Cupcakes Recipe' from Glorious Treats (an amazing blog by the way) and I tried this recipe. ow, I make this vanilla cupcake recipe very often.

The recipe i am reviewing has been altered by the author but i still use the original recipe. The original recipe calls for essential baking ingredients that i almost always have at home. The instructions for making these cupcakes are written clearly and are easy to follow.


Below are the different results I have gotten after baking this recipe many times with slight alterations.

Perfect vanilla cupcake

  • Making the recipe as recommended(Mixing by hand)
  • Making the recipe as recommended (Using a mixer)
  • Replacing cake flour with plain flour+corn flour
  • Replacing cake flour with self-rising flour
  • Incorporating other extracts
  • Including dry add-ins (fruits and nuts)

  • Using the recipe as recommended (mixing with a handheld mixer)

The perfect vanilla cupcakes recipe includes cake flour.  This is not a staple in my pantry, so i had to make a run to the store for this. The outcome of making this recipe as directed was a cupcake that was light, airy, soft and flavorful.

This recipe was well received by all the individuals that tasted it. This is an easy recipe to make and i get consistent results when i use this recipe.

  • Using the recipe as recommended (Mixing by hand)

I prefer recipes you can mix by hand and the perfect vanilla cupcakes recipe falls into this category. It is easy to mix especially since it does not require creaming butter and sugar.  

One thing that I came to realize was that using a mixer helped me get somewhat lighter cupcakes and a better crumb. This was due to the fact that the mixer allowed for better incorporation of air into the batter from the start. 

The result of mixing this recipe by hand was still good. No one could tell the difference between the batch of cupcakes mixed by hand and the ones made using a mixer. 

Perfect vanilla cupcakes

  • Replacing cake flour with plain flour+corn flour

 After trying the recipe with cake flour as directed, I also made this recipe using Plain flour and cornstarch as a substitute for the recommended cake flour. Honestly, the difference was near invisible. The cupcakes were just a little less tender but not noticeably so.

  • Replacing cake flour with self-rising flour

 The use of cake flour in this recipe is to ensure a light and airy cupcake. Furthermore,using cake flour ensures that the chances of gluten development during the mixing process is reduced. I made use of self-rising flour to see what results I would get. I also made sure not to over-mix when I used the self-rising flour.

 The cake tasted nice but had a  texture that fell short of the others made with cake flour.

  • Incorporating other extracts

 I always view a vanilla cake or cupcake as a foundation for the creation of other recipes. This is why i am always particular about how extracts work with vanilla cake recipes. This recipe paired well with other extracts. It is indisputably a basic vanilla cupcake that can be transformed into something amazing.

  • Incorporating fruits and nuts

 I have a mother that loves dried fruits in all pastries and bakes. If you are like her, this recipe may not be your cup of tea. The reason is that this batter is very runny and this causes the dry add-ins to sink to the bottom.

 The solution for this is to cut the dried fruits into smaller chunks and dusting them with flour  before adding them to the batter. On the other hand, the batter makes really nice upside down cupcakes. If you prefer, place the fruits at the bottom of your cupcake case before adding the batter.

Do i recommend this recipe?

Yes, this perfect vanilla cupcakes recipe is one EVERY baker should have in their recipe book. It has the texture of a boxed cake-mix alongside the taste of a homemade cupcake. It is my go-to cupcake recipe for events because it is a crowd-pleaser.

This cupcake is a perfect canvas recipe. You can alter it (within reason) to become another flavor while still maintaining the beautiful texture of the cupcake.

Tips


  •  For this recipe, use pure vanilla extract. Due to the nature of this cupcake recipe, the extract you use is very prominent.If you use imitation vanilla, it is quite obvious and not as good as it should be.
  • These cupcakes dry out very quickly. Set a timer and take the cupcakes out of the oven immediately they are done.


9 Baking Tips For The Busy Baker

Baking requires time and patience and, these are two things not all people have to spare.

Baking Ingredients

To make baking a faster task, I have looked at the things that take up a lot of time when baking and compiled 9 baking tips for the busy baker.

1. Use a doctored cake mix

A boxed cake mix is incredibly convenient but does not taste homemade or rich. To cut the time spent making a cake from scratch, use a box mix but change a few ingredients.
Use butter instead of oil, milk instead of water and an extra egg. A tablespoon of mayo will even add more body and moistness to a boxed cake mix. By using a boxed cake mix, you get more flavor in a shorter length of time.

For a different flavor or improved flavor, poke holes into the boxed mix and drizzle on a syrup, cream or sauce. This poke cake will be ready in no time.
If you dislike using boxed cake mixes, make your own cake mix. This involves premixing dry ingredients and adding liquid ingredients when you wish to use them. Find recipes for homemade boxed cake mixes here, here and here.

2. Buy pre-made dough

Baking purists may be against buying pre-made dough but I am not. A pre-made dough is great for a quick dessert, bread or pie.
If you are a busy baker, buy pre-made cookie dough for a quick cookie treat whenever you need a cookie or two. Make this homemade by adding a couple of nuts or chocolate chips to the cookie dough after you have portioned them out.

For the lover of flaky pastries, frozen puff pastry is your friend. You can use these sheets to make many treats, sweet or savory. The best part is that you do not need to bother with the laminating process but still enjoy the flaky crust. If you make many pastries, stock up on Filo sheets and puff pastry.

3. Make batters and dough in bulk 

One tip for the busy baker is to make batters and bread dough in bulk.
Cookie dough is the easiest baked good to freeze. Scoop balls of cookie dough onto a sheet pan and put it in the freezer. When the cookie dough is frozen, put the balls of dough in a freezer bag.
If you prefer to cut out cookies, roll out your cookie dough between two parchment sheets. Then put your sheets of rolled out cookie dough onto a cookie sheet and into the freezer. After the cookie sheets are frozen, pop them into a large freezer bag. When you are ready to use your cookie dough, leave out a sheet of cookie dough for 5 minutes and then cut out your cookie with a cookie cutter.

For those that like having a muffin for breakfast or a snack, make a large batch of muffin batter. Spoon the batter into the baking case lined muffin pan and freeze them. Put the pan of unbaked muffins in a large freezer bag or cover with Clingfilm. Get the recipe for muffins that can be frozen here.

You can freeze streusel toppings too. Streusel can transform a simple cake, cupcake or sweet bread. It is one of the things you should have in bulk if you are a busy baker. Mix up your streusel, place in on a flat sheet /tray and put it in the freezer. When the streusel is frozen, break up the sheet and store it in airtight freezer bags.
 If you wish to bake a cake or cupcake, simple take out some streusel, put it on top of the batter, and return the rest to the freezer. A plain vanilla cake batter with a layer of streusel in the middle and at the top of it makes a lovely coffee cake.

Bread dough can be made in advance, portioned out, wrapped in cling film and frozen. When it is time to use your dough, take your dough out of the freezer and leave it to come to room temperature. It comes to room temperature, shape your bread dough and leave it to rise. Bake the risen dough as directed in the recipe.
Frozen bread dough can be used to make things other than bread. Dinner rolls, pizza and are a few things you can do with bread dough
.
You can freeze cakes for 2-3 months after baking them. Properly wrapped and stored, your cake will taste freshly baked. This is a great tip for when you need a cake for an impromptu event or just do not have the time to bake a cake. Here are some tips for storing unfrosted cakes.

4. Baking spray 

Dislike the process of greasing and flouring baking pans? A baking spray with flour is the answer. When I am in a hurry, I do not want to deal with brushing on oil or butter and flouring a pan or,  have to clean up all the flour afterward.

Simply put the baking pan in a clean sink and use a baking spray. By doing this, you are reducing the time spent greasing your pan and you can rinse your sink to get rid of any residue from the baking spray.

5. Use a flower nail for a less domed cake

For an evenly cooked cake with little or no dome, bake your cake with a metal flower nail in the middle. Not only will it ensure that your cake does not dome and make it easier to decorate, it will also help your cake bake faster. For a large cake, you may need multiple flower nails. Cut out the time spent cutting off cake domes by using this tip.

6. Use baking spray when measuring sticky items

When measuring out sticky items in a cup or ice cream scoop, first use a little baking spray on your measuring tool. This will ensure that the honey, molasses, butter and even cupcake batter slides out of your measuring cup and does not make a mess.

7. Have you run out of an ingredient? DIY

If you have run out of an ingredient, you need while baking and are too busy to run out to get it, try to use substitutes.
While you may not be able to substitute all ingredients, you can successfully use some substitutes in a pinch. Run out of eggs? You may be able to use applesauce or mashed bananas in its place. No unsweetened chocolate? Use 3 tablespoons of cocoa powder and 1 tablespoon of butter, margarine or oil to get 1 oz of unsweetened chocolate. No oat flour, make your own by blending your oats in a blender. Make your buttermilk with milk and vinegar or lemon juice.

 Many substitutions are available for when you do not have an ingredient or cannot use the said ingredient. Here is a list of baking substitutions.

8. Marshmallow frosting/ melted chocolate spread

To frost 12 cupcakes in record time, place a large marshmallow on top each of the cupcakes 5 minutes before the baking time elapses. The marshmallow will melt over the cupcake giving you a white frosting with little to no effort. If you would like a toasted marshmallow frosting, put the cupcakes under the broiler for 30 seconds at a time until you are fine with the color.

If you prefer a chocolate frosting, place a chocolate square on the cupcakes a few minutes after they are out of the oven. After the chocolate has melted, spread out the chocolate with a knife.
Follow the same process for larger cakes.


Banana sponge cake

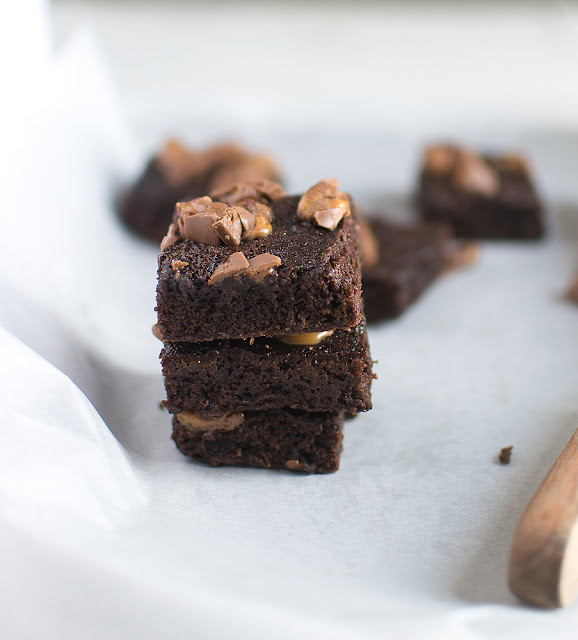
9. Use toasted nuts, chocolate shavings, and fruit to decorate baked goods

Baking a dessert is easy with enough practice. The hard part is baking a cake and decorating it beautifully in a limited time. This is a tip for the busy baker who needs beautiful desserts in a limited time frame. Decorate your dessert with chopped nuts, chocolate curls or nuts, chocolate curls, or shavings.
Forget the buttercream and fondant, whipped cream and fruit are awesome for decorating homemade cakes. It is quite easy to go overboard with drizzles, glazes, and garnishes so use just a little at a time.

Do you have any tips for the busy baker? Leave it below in the comment section. I would like to know what hacks, tips or tricks you use to reduce the time spent baking.

Recipe Review: Three Ingredient Sesame Snaps by The Olympic cooking Channel

Sesame snaps are ridiculously addictive. The sweetness of this treat, the nuttiness, the crunchy texture and the vanilla flavor are a match made in heaven.


Previously, I wrote about trying the sesame snap recipe from Not quite Nigella. In my search for perfection, I decided to try another sesame snap recipe. I was looking for a recipe with less sugar and something remotely close to a healthier version.

After checking numerous blogs, I found the Three ingredient sesame snap recipe from The Olympic Cooking Channel on Youtube. This recipe intrigued me because it calls for less than half the amount of sugar in the sesame snap recipe from Not quite Nigella.

To make this, you will need sugar, honey and sesame seeds. I use vanilla bean paste with this recipe though so that makes it 4 ingredients. If you like sweet and salty treats, you can add a little salt while you cook the sugar.

This sesame snap recipe is easy to make and does not harden immediately. The slower hardening time gives you a little leeway to roll these as thin as you want. Also, if you want to cut your sesame snaps into different shapes, this is the right recipe for that. Other recipes I have tried harden too fast for me to roll them very thin and cut them into rounds as well.

 I will attach the recipe and instructions for making this below because it is only available on youtube and somewhat difficult to find.


I have made this recipe in a few ways and here are the results:
  • Using this recipe as written
  • Using white sugar instead of brown sugar

Using this recipe as written

The first time I made this recipe, my sesame snaps didn’t get hard and were like a fruit leather. The reason for this being that I did not let the honey and sugar mixture boil long enough. It still tasted great. If this happens to you, eat the sesame snaps quickly or keep them in the fridge so they stay hard.

My second attempt at making this sesame snap recipe was far more successful. Once cold, the sesame snaps got harder but not as hard as the previous recipe () I made. At first bite, ‘sesame crunch’ came to mind. These sesame snaps were not hard and did not have a snap but rather had a crunch that I really liked. This recipe is moderately sweet and not cloying at all.
The use of brown sugar and honey lends an extra layer of flavor and complexity to the taste of these snaps. Using vanilla bean paste further improved the taste of these sesame snaps.

Using white sugar instead of brown sugar

I almost always use white sugar when making this recipe. The outcome of making this change was a deep caramel flavor that complemented the natural honey I used very well. To make sure the sweetness of this was not cloying, I added a pinch of salt to this recipe and before pouring out the mixture onto a silicone sheet to be rolled out, I rubbed a little butter on the sheet. The nuttiness of the sesame seeds, caramel flavor of the white sugar, honey and tiny bit of salt and butter were very complimentary pairings. This combo creates the most addictive sesame snaps I have made.

Do I recommend this recipe?


Yes, I do. Apart from this being very easy to make, you can make these without a candy thermometer. The flavor of these snaps makes them seem like they took more time and effort to make than they actually did. They are not overly sweet and kids or adults will love them. I feel like these will make an awesome addition to any snack recipe book, mainly because of a lot of people like them.

Tips for making this recipe

-Do not burn your sugar.  Heat your sugar and honey mixture in a heavy-bottomed saucepan on a low heat.
-Toasting your sesame seeds enhances the nutty flavor and adds some crunch to the snaps.
-Roll your sesame snaps between 2 lightly buttered parchment sheets for easy cleanup.
-For equal-sized sesame snaps, cut them a minute or two after rolling them out on parchment paper. For shards or sesame snaps, allow your brittle to harden before breaking it apart.

Get the Printable Recipe
Professional Blog Designs by pipdig